Home made transfers.
One of the most commonly seen forms of decoration on a tobacco tin are transfers.Nearly all of these transfers are non commercial, nearly all of them have been home made from pictures liberated from books or magazines and other sources.All we have to do is to find a picture we like that will fit onto our tin.
Below we have a selection of pictures cut from old magazines, comics, calendars, and unwanted books.
 |
| Cut out pictures. |
Making a transfer is easier said then done.
In theory the process sounds simple. Find a picture and cover with varnish then remove the backing paper before apply what's left to the tin.
It works as the varnish sticks to the surface of the paper when it dries which is the printed surface, when the backing paper is removed the ink remains attached to the varnish as a transparent film.
However the paper may be very porous and soak up the varnish making the backing paper difficult or impossible to remove later in the process(comic and news paper type paper). The transfer may just break up on it's own accord whilst trying to manoeuvre it into position due to it being fragile. Even the size of the transfer will make things difficult. The larger the transfer the more delicate it is and the more likely it will break up, (Smaller transfers are much easier to work with). Even the ink may run. Things can go wrong but as in all forms of art and craft we pick ourselves up and try again.
When it comes down to it, with practice using the technique we can get better. Most people when they first try to make a transfer will run into problems. Hopefully this tutorial will help to overcome some of them.
Making the transfer.
First we choose a picture we like. A useful hint here is to cut the picture much bigger then we need it. The reason for this is later in the process when we remove the backing paper the edges will become a little nibbled so we need to allow for a little loss of the design around the edges.
 |
| Our picture, varnish and brush. |
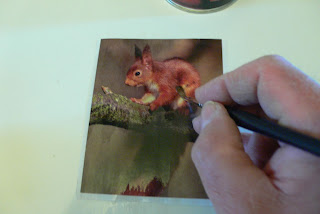
In this case somebody wanted a red squirrel tin, so we found a picture of a red squirrel in a magazine and cut it out so its much larger then the tin we wish to use if for. The next item we need is a soft brush, a soft brush will minimise the amount of air bubbles we add to the varnish. We also have a tin of Polyurethane yacht varnish. Do not use water based varnishes as they are not strong enough for the job.
 |
| Starting to varnish the picture. |
The first step is to add a layer of our Polyurethane varnish. Then put the picture aside to dry for a day. I would suggest 24 hours to be sure the piece is dry before we add another coat. In total I tend to use four coats of varnish on the picture which will add strength which will become important when we start to remove the backing paper. In all it took 4 coats of varnish over 5 days of drying before I even attempted to remove the backing paper.
Nobody said it was going to be a quick process in making a transfer.
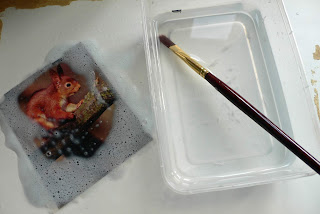
Once fully dry the next step is to start to remove the backing paper. I simply float the picture face up in a tub of water. The water will soak into the paper and start to soften it. You can quite easily leave the picture for several hours if you wish.
 |
| Leaving the picture to soak to soften the paper. |
Our next step is to start to remove the backing paper. Find a very smooth surface to lay your picture face down on so that the back of the piece is facing upwards. Make sure the surface you lay your picture down is very smooth and that there are no lumps and bumps under the picture. These lumps and bumps will cause the transfer to easily tear or form holes so it is vital to keep the working area spotless when we remove the backing paper.
 |
| Rubbing the back of the picture with our fingers to remove unwanted paper. |
The above picture shows the process of removing the backing paper. Simply using your finger start to rub the soft wet paper slowly, eventually you will break through the surface and rubbing and rolling the paper becomes easy. The paper often comes away in little rolled tubes. These can be easily be picked off and put in the rubbish.
The picture below shows the backing paper coming easily away. If the paper starts to feel dry or won't come away easily simply drop the transfer back into your tub of water so that it can soften up a bit more.
 |
| Backing paper peeling away easily. |
The picture below shows how far we have got after several attempts to remove the backing paper. By now the picture has been in the tub soaking several times. Water is your best friend, so keep using it.
Gradually we move paper layer by layer until the transfer itself starts to poke through. This is where we need to be really careful.
 |
| Half way there, The transfer starting to show through the paper.. |
One final good soaking in the tub to soften the last of the paper clinging to our transfer.The less paper we have supporting the picture the more fragile it becomes and it will start to fold over quite easily if we are not careful.
 |
| A final soak before we remove the last of the paper. |
 |
| Removing the last remnants of the paper. |
The above picture shows the last remnants of paper being removed by hand. By now the transfer has got very thin and handling it has become a bit of a problem.
When a transfer gets this thin it will easily stick to the working surface. Keeping the working surface and transfer wet at all times will enable us to move and manipulate the transfer easily when required.
 |
| The white chalky film on the surface to the transfer. |
The above picture shows that the paper has been totally removed. But if you look closely you can see a white chalky surface appearing when the transfer dries. This white dusty looking layer is the coating the paper received to give it a smooth surface. It is usually a clay which could contain kaolinite(china clay), chalk or talc.
We have to remove this white filmy layer otherwise it will show up on our tin when applied.
Now for our secret weapon.To remove it we use a household lime scale remover and a stiff acrylic paint brush.
 |
| Items needed to remove the chalky film. |
Simply spray the lime scale remover onto the white filmy surface of the transfer and using the acrylic paint brush in a circular motion gently brush the back of the transfer. It will quite quickly eat into the white film and remove it. The transfer will be left unharmed.
 |
| The back of the transfer sprayed with lime scale remover. |
The above picture shows the squirrel on our transfer clearly showing through. All that we have left now is the varnish and the ink. There is no paper left.
 |
| Washing down the transfer with water to see if any more white film needs to be removed. |
 |
| The final soaking to remove remaining lime scale removal chemical. |
Now we have to remove the lime scale remover. Water remains our best friend and the transfer can either be placed back into the tub to soak or the chemical can be removed by water and brush or simply rinsed off under the cold water tap.
However the transfer is now very flexible and will happily and easily fold any which way it can. You will also find that it has also become very fragile around the edges. Damage seems to be unavoidable at this stage. To help manoeuvre the fragile transfer I have transferred it from the smooth working surface to a clean sandwich bag. The sandwich bag will enable me to move the transfer easily without any further damage occurring.
 |
| The fragile transfer has been slid onto a food bag so it can be handled without any further damage occurring. |
Below we can see on the close up photo of the squirrel transfer nibbled edges I talked about earlier. This is one reason when we always make the transfer bigger then what we actually need it. Provided we keep the transfer wet we can easily unfold any areas and lay down the transfers folded edges by carefully using the paint brush.
 |
| Nibbled edges to the transfer. |
The finished transfer clinging to our sandwich bag. Notice how thin and fragile it is. This is a good transfer and clean of any paper, dirt or grit. There is no chalky residue remaining. It's rather beautiful in this state as light passes through it like a stained glass window.
 |
| The picture from the magazine has now been turned into a transparent transfer. |
We should still be keeping our transfer wet until the time we need to use it and apply it to our chosen tin. Water will help us to straighten out those folded over edges. Simply take our stiff acrylic painting brush and using the tip of the brush to gently rollout and flick the folded edges straight.
The next step for this transfer is to apply it to our chosen tin. This we will cover in part two of this tutorial which will be coming soon.

No comments:
Post a Comment