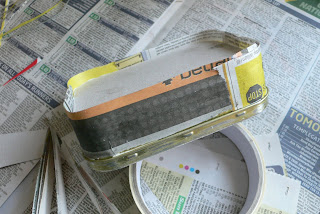
Most people will say "Why paper the tin, we won't see the paper anyway as it is hidden under the matches or wood veneer?".
The answer is simple. It will give the wood and glue something to hold onto. Wood glued directly onto a tin no matter what glue we use will quickly crack away. We don't want that to happen after all the work we have done to the tin. It's rather disheartening for a tin we have worked hard on to fall apart especially if we are fond of it and have gotten attached to it.
The paper we can use to cover the tin can be anything from old newspaper to photo copy paper and even old utility bills. I have used all sorts for the job. One of the great things about tin art, most of what we use can be recycled stuff most people would normally throw away.
For this tin I am using an old newspaper.
 |
| Cut paper ready to attach to tin. |
I tend to start with the edges of the tin, which is also the most tricky part in covering. I cut the paper in strips wider then required. There is a reason for this later on. Take our strong PVA wood glue and smear it on the tin where we wish to place the paper. Then tear off a piece of our paper strip to the length we require. Place it on the tin and with our fingers smooth it down gently getting the paper into all the nooks and crannies. Please be gentle with the paper as when it gets damp or wet it also gets fairly fragile and will easily tear and come apart.
When the paper and glue is dry add another piece of paper, and keep repeating the process until the edges have been covered.
 |
| Sides of tin with paper attached. |
When the glue has dried we then need to cut the paper around the edge forming small tabs.We can then fold and glue these flat with the top or bottom of the tin. This is why the paper needs to be a little wider then the depth of the sides.
 |
| Cut tabs to allow the paper to easily fold down around corners. |
All we have to do is apply glue on the top/bottom around the edge and fold over the tabs so they are flat with the top or bottom.
The next step is to cut a piece of paper and glue it into place on the top or bottom of the tin. This will finish covering the tin. Carefully smooth out any air or glue bubbles that may of formed under the paper if necessary. Don't worry about really small ones as they will usually flatten out when the paper shrinks as it dries.
 |
| Base of tin papered ready for light sanding. |
Above shows the bottom of the tin fully papered. There is one final step before we move on. Once fully dried we will roughly sand the tin lightly to remove any left over rough edges and to try to get a fairly flat surface to glue the wood veneer or matches onto.
The next tutorial we will be applying a traditional covering of matchsticks.

No comments:
Post a Comment