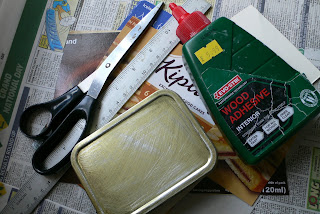
Most tobacco tins have sunken areas that need to be built up before we can start to cover them. This will give us a nice flat top and bottom to our tin and a better surface to decorate at a later date.
The tools required will be a pair of scissors and a good ruler or another item with a good flat edge.
We need cardboard. Not corrugated as this will compress down if we apply pressure which is not good and cause our wood coating to crack away and fall off at a later date.
What we really need is good quality compressed card like we can easily find in old cereal packets and cake boxes. This card can easily be glued layer upon layer and form a good solid surface.
Firstly we need to cut the card to size so that it fills most of the sunken areas of the tin on the top and bottom. We do not need to be too neat and tidy about this packing. It's only there to fill the dip and help to level off the top and bottom of the tin.
The glue I prefer is a good quality high resin wood glue. Nothing else any stronger is necessary. All we have to do is to coat areas of the tin we wish to stick the card with the wood glue. Get a good even coating. You can use your fingers if you like to get the glue into all the nooks and crannies. One layer of card may not be enough so you may need to add several. Keep adding pressure to the glued card with your fingers so that it holds nice and flat and does not start to lift up until the glue is tacky enough to hold it down itself.
Using the flat edge of your ruler you can check for areas that still needs to be built up which are not level with the raised edges of the tin. If needed more card packing may be added until you are happy with the dip in the tin being filled in totally and nice and level.
The picture above shows the packing in place used to fill in the dip in the lid. The next stage is to totally cover the top and bottom of the tin with a piece of card. This is roughly cut to shape and glued on as before. Don't forget to keep adding pressure with your fingers until the glue has become tacky enough to hold it together.
Once dry the card can be trimmed close to the tin and the edges can be lightly sanded back level with the tins sides.This completes Packing Out. In the next tutorial we take a look at applying a layer of paper which will help in holding the wood to the tin.


No comments:
Post a Comment